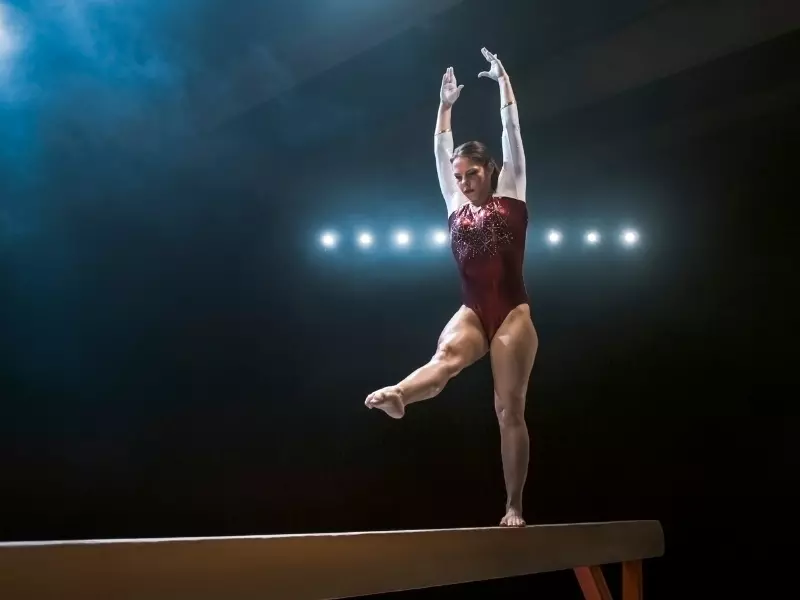
The balance beam, often deemed the epitome of grace and precision in gymnastics, holds a unique allure. Its slender form demands not just physical prowess but an intimate dance of focus, balance, and confidence. Traditionally, the journey to mastery has been undertaken within the hallowed halls of professional gyms under the watchful eyes of seasoned coaches. However, with the rise of home-based training and self-guided learning, many are now exploring the path to beam proficiency within the comforts of their homes.
This guide will navigate you through the intricacies of home-based balance beam training. From setting up your practice space to advanced choreography, let’s embark on a journey to conquer the beam, step by meticulous step, all from the convenience of your personal space.
Contents
I. Safety First
Practicing gymnastics, especially on a balance beam, requires precision, balance, and concentration. While training at home offers convenience, it also brings unique challenges due to the potential absence of professional equipment and supervision. Before diving into your balance beam exercises and routines, prioritizing safety is of utmost importance. Here’s a detailed breakdown of the considerations you should make:
1) Choose the Right Surface
The foundation for your balance beam practice is the surface you place it on. This can make a significant difference in ensuring your safety.
- Material Matters: Hardwood, tiles, or any other slippery surfaces are not ideal as they can cause the beam to shift or you to slip upon dismount. It’s crucial to have a non-slippery and stable floor.
- Cushioning: Whether you’re a beginner or an expert, falls are an inevitable part of practicing on a balance beam. Using gym mats or thick carpets beneath and around your beam can help absorb the shock from any potential falls, reducing the risk of injury. These mats provide a layer of protection, cushioning your body.
- Consistency: Ensure the surface is consistent throughout. Avoid placing half the beam on a carpet and the other half on tiles, as this can lead to unevenness, posing a significant hazard.
2) Clear the Space
Your practice environment should be spacious and devoid of any potential hazards:
- Room to Move: Ensure there’s ample space around the beam. This means considering the length, breadth, and height. The space you practice in should be able to accommodate a fall, jump, or any wide moves without any obstructions.
- Remove Obstacles: Everyday home items, such as furniture, toys, or decorative items, should be removed from your practice area. They not only pose a trip hazard but can also cause more severe injuries if you were to fall on them.
- Designate a Practice Area: If possible, try to have a designated practice space that remains clear at all times. This reduces the prep time and ensures consistency in your training environment.
3) Spotting
The presence of another individual during practice can be a crucial safety net:
- Understanding the Role: A spotter’s primary role is to help prevent injuries by assisting in stabilizing the gymnast, especially during new or challenging moves. This role requires attentiveness and readiness to intervene if things go awry.
- Who Can Spot?: While a trained gymnast or coach is ideal, in a home setting, even a family member with a basic understanding of your routines can be valuable. Brief them on when and how they might need to assist you.
- Multiple Spotters: For more advanced moves, consider having multiple spotters on both sides of the beam. This provides added security as you execute your routine.
- Stay Vocal: Communicate with your spotter. Before attempting a move, let them know what you’re about to do, so they’re prepared.
At-home balance beam practice, while convenient, demands a heightened sense of responsibility towards safety. The absence of professional equipment and supervision means that the onus of ensuring a safe environment falls entirely on the practitioner. By selecting the right surface, maintaining a clear space, and having vigilant spotters, you can make your home practice both safe and effective.
II. Choosing Your Beam
The balance beam is a quintessential piece of gymnastic equipment. Whether you’re a budding gymnast or a seasoned professional looking to practice at home, choosing the right beam is essential for both your progress and safety. Here’s a detailed breakdown of the different types of beams and considerations for each:
1) Professional Practice Beams
These beams are specially designed for those who aim to replicate the experience of training in a professional environment.
- Height and Stability: While these beams are closer to the ground compared to competition beams, they maintain a slender width, offering a realistic practice experience. Their low height reduces the risk of injury from falls, making them ideal for home environments.
- Material: Crafted using high-quality materials, they ensure a firm yet slightly padded surface, which is pivotal for practicing intricate moves.
- Purchasing Options: While specialized gymnastic stores are the go-to places to buy these beams, many reputable online stores also stock them. When purchasing, always check for user reviews, beam specifications, and any safety certifications.
- Investment: These beams can be on the pricier side, but they’re a long-term investment, especially if you’re serious about your gymnastics journey.
2) DIY Beams
For the hands-on enthusiasts or those on a tight budget, creating a DIY beam can be both cost-effective and rewarding.
- Materials: A sturdy piece of wood, preferably a 4×4, can serve as the base. The length can vary based on your needs and space. Padding is crucial, so using a thick foam or multiple layers of yoga mats can provide the necessary cushioning.
- Assembly: After padding the wood, secure it with adhesive. For added grip, you can cover the padded surface with suede or a non-slip fabric.
- Safety: Ensure your DIY beam is stable. Check regularly for any loose parts or signs of wear. Since it’s a homemade piece, it requires more frequent inspections compared to professional beams.
- Versatility: The beauty of a DIY beam is that you can adjust its height and firmness based on your preference. However, for beginners, keeping it flush with the ground is advisable.
3) Improvisation
If you’re not ready to commit to a physical beam or lack space, improvisation is the key.
- Tape Beam: A simple line of tape on the floor can serve as a makeshift beam. While it doesn’t offer the raised experience, it provides a guideline for practicing foot placement and alignment.
- Benefits: It’s perfect for basic moves, drills, and even dance routines. Since there’s no elevation, the risk of injury is minimal.
- Materials: Use a thick, visible tape, ensuring it’s smooth and adheres well to the floor. Avoid materials that might become slippery when stepped on or that leave a residue.
- Flexibility: This method offers the advantage of flexibility. You can easily adjust the length, replace it, or remove it entirely based on your needs.
Your choice of beam will invariably depend on your goals, budget, and available space. Whether you opt for a professional, DIY, or improvised beam, the crucial aspect is regular practice and safety. By understanding the pros and cons of each type, you can make an informed decision that aligns with your gymnastic aspirations.
III. Warm-Up
Every seasoned gymnast knows that a proper warm-up is not merely a prelude to the main practice but a vital component that can determine the success and safety of the entire session. Warm-ups serve to transition the body from a state of rest to one of physical exertion, preparing the muscles, tendons, and joints for the intensive movements intrinsic to gymnastics. Here’s a detailed guide on warming up effectively before delving into your balance beam practice:
1) Cardio: Ignite the Engine
The primary aim of the initial cardio phase is to elevate the heart rate, increase blood flow to the muscles, and elevate the body’s core temperature, which makes the muscles more elastic and pliable.
- Skipping: This isn’t just child’s play. Jumping rope is a full-body workout that engages the legs, core, and arms. Maintain a steady rhythm, and as you become more proficient, you can incorporate variations like double unders or high knees.
- Jogging in Place: This exercise is straightforward but effective. Ensure you’re lifting your knees high and maintaining a consistent pace. To add some variety, you can intersperse with some butt kicks.
- Jumping Jacks: A classic exercise, jumping jacks offer both cardio and a preliminary stretch, particularly for the inner and outer thighs. Ensure your movements are coordinated: arms going overhead as the legs go out and vice versa.
2) Stretching: Prime the Muscles
Dynamic stretching is the preferred method here, as opposed to static stretches. Dynamic stretches improve range of motion, enhance muscular performance, and further boost your heart rate.
- Leg Swings: Holding onto a wall or a sturdy object for balance, swing one leg forward and backward in a controlled motion. This stretch targets the hamstrings and hip flexors. After a set number of swings, switch to side-to-side swings to target the inner and outer thighs.
- Arm Circles: Start with small circles, gradually increasing the diameter until you’re making broad, sweeping circles. This exercise warms up the shoulders and upper back, areas of paramount importance for balance and control on the beam.
- Torso Twists: With feet shoulder-width apart, keep the hips steady and rotate the torso from one side to the other. This dynamic stretch engages the core, particularly the obliques, and helps in warming up the spine.
3) Additional Tips:
- Duration: The intensity and duration of your warm-up should correlate with your main practice session. If you’re planning an intensive routine on the beam, ensure your warm-up is thorough.
- Breathing: Never hold your breath. Maintain steady and deep breaths throughout your warm-up. This ensures optimal oxygen supply to the muscles, preparing them for the session ahead.
- Hydration: Sip water before and after the warm-up to stay hydrated.
Warming up is an integral component of any fitness regimen, especially in a discipline as demanding as gymnastics. By giving due importance to both cardiovascular activities and dynamic stretching, gymnasts can ensure they are not only minimizing the risk of injuries but also optimizing their performance on the balance beam. The body, when adequately prepared, is more responsive, agile, and less prone to strains, ensuring that the gymnast can focus on perfecting their routine with confidence.
IV. Basic Exercises for Balance
Balance is the cornerstone of any successful performance on the balance beam. Mastering the fundamentals on this narrow apparatus requires a combination of strength, stability, and spatial awareness. Before attempting more advanced skills, one should hone their balance with some basic exercises that serve as foundational building blocks. Here’s a deep dive into these primary exercises:
1) Walking: The Beam Introduction
The beam, though seemingly simple, can be daunting due to its limited width. Walking exercises are the first step to becoming acquainted with its surface and learning to distribute your weight effectively.
- Forward Walk: Begin at one end, placing one foot in front of the other, heel to toe. Focus on maintaining a straight line and engage your core for stability. This not only familiarizes you with the beam but also boosts confidence in moving linearly.
- Backward Walk: Similar to the forward walk, but this time, you’ll be retracing your steps in reverse. It challenges your spatial awareness and demands greater concentration.
- Sideways Walk: By moving sideways, you engage different muscle groups, especially the inner and outer thighs. Ensure your toes are pointing forward and avoid letting your feet cross over each other.
2) Balancing on One Foot: Enhancing Ankle Stability
The balance beam requires a lot from our ankles. They stabilize us, help in shifting weight, and play a crucial role in landings.
- Passé Position: Begin by standing straight, then lift one leg so the foot of the lifted leg is near the knee of the supporting leg, resembling a triangle. Hold this position, focusing on keeping the supporting ankle steady. This not only strengthens the ankle but also engages the core, which is pivotal for balance.
- Duration & Switch: Aim to hold the position for a set duration, say 15 seconds, and then switch to the other foot. As you progress, increase the duration.
3) Jumps: Taking Flight with Confidence
Incorporating jumps into your routine is a significant leap (literally) in your beam practice. It teaches you to manage aerial space and instills confidence in your landings.
- Straight Jumps: Start with your feet together. Bend your knees slightly, and then push off the beam, extending your legs and feet straight out. While airborne, keep your arms either out for balance or up by your ears, then land softly with knees slightly bent to absorb the impact.
- Tuck Jumps: From a similar starting position as the straight jump, when you leap, pull your knees into your chest. Ensure your back remains upright and doesn’t lean forward. Land with soft knees, ensuring equal weight distribution on both feet.
The balance beam is an exercise in precision, and these basic exercises set the foundation for more advanced routines. They not only help in mastering the art of balance but also foster confidence, strength, and spatial awareness. Regular practice of these foundational exercises ensures that when you progress to more complicated maneuvers, your body and mind are well-prepared to handle the challenges of this demanding apparatus.
V. Cultivating Core Strength
In gymnastics, particularly when mastering the balance beam, the core serves as the body’s powerhouse. It’s the epicenter of stability, control, and agility. A strong core translates to better balance, smoother transitions, and a reduced risk of injuries on the beam. When practicing at home, integrating dedicated core-strengthening exercises can significantly enhance your beam skills. Here’s a detailed look into some of the most effective core exercises:
1) Planks: The Ultimate Stability Workout
Planks are arguably one of the most comprehensive core exercises. They engage not just the superficial abdominal muscles but also the deeper core muscles, which play a crucial role in stabilizing the body.
- Execution: Begin by getting into a push-up position, but rest your weight on your forearms instead of your hands. Ensure your body forms a straight line from your head to your heels. Engage the core by pulling your belly button in towards your spine.
- Variations: Side planks can be introduced to target the obliques more intensely. Elevating the feet or introducing movement, such as plank-to-pike, can also amplify the challenge.
- Benefits: Beyond the core, planks also work the shoulders, back, and glutes, promoting overall stability and posture — essential attributes for beam routines.
2) Bicycle Crunches: Targeting the Obliques
Twists, turns, and side balances on the beam demand strong oblique muscles. Bicycle crunches are an excellent exercise for targeting this area.
- Execution: Lie flat on your back, hands behind your head, and legs raised. Bring your right elbow and left knee towards each other while straightening the right leg. Alternate sides in a pedaling motion.
- Intensity: The closer your straightened leg is to the ground without touching it, the more intense the exercise becomes.
- Benefits: Apart from the obliques, bicycle crunches also engage the rectus abdominis (the front sheath of the abdominal muscles), promoting rotational strength and control.
3) Leg Lifts: Strengthening the Lower Core and Legs
The lower abdominal muscles often get less attention, but they’re pivotal for movements on the beam, especially when lifting and controlling leg positions.
- Execution: Lie on your back, hands by your side or under your glutes for support. Keeping your legs straight, lift them off the ground to form a 90-degree angle with your body, then lower them without letting them touch the ground.
- Modifications: To increase difficulty, add a hip lift at the top of the movement, lifting your glutes off the ground. Alternatively, introducing scissor kicks while the legs are elevated can add variety and intensity.
- Benefits: Beyond the lower abs, leg lifts also strengthen the hip flexors and thighs, essential muscle groups for various beam skills.
Core strength is more than just about achieving well-defined abs; it’s about building a robust and resilient foundation that supports every move on the balance beam. By consistently integrating these exercises into your at-home training regimen, you prepare your body for the nuanced and intricate challenges the balance beam presents. Remember, a strong core equates to enhanced control, precision, and confidence in your routines.
VI. Incorporating Dance and Choreography
Mastery of the balance beam is not just about athletic prowess but also about artistry and expression. As gymnasts progress from basic skills, integrating dance and choreography becomes paramount. The seamless fusion of technical elements with dance not only enhances the aesthetic appeal of a routine but also showcases a gymnast’s versatility and artistic interpretation. Here’s a closer look at how you can gracefully blend dance steps and choreography into your beam practice:
1) Chain Steps Together: Building Flow and Sequence
A compelling beam routine is akin to telling a story. Chaining steps together creates a narrative, making the routine fluid and engaging.
- Transitions are Key: The flow between moves such as walks, turns, and jumps should be seamless. Consider how one move can naturally lead to the next. For instance, a sideward walk can transition into a pirouette, which then sets you up for a tuck jump.
- Variety: Introduce different levels of movement. After a series of aerial skills, incorporate floor-level dance moves, such as chassés or split leaps. This creates dynamic visual interest.
- Repetition with Variation: Repeating certain steps can provide a thematic touch to your routine, but ensure there’s a slight variation each time to keep the audience engaged.
2) Play with Rhythm: Let Music be Your Guide
While the balance beam is often associated with silence and concentration, adding music can invigorate your practice sessions and introduce a rhythmic element to your movements.
- Choose Your Soundtrack: Opt for a piece of music that resonates with you. Whether it’s classical, contemporary, or even instrumental pop, the music should inspire movement and emotion.
- Internalize the Beat: Before executing moves on the beam, listen to the music several times. Understand its crescendos, its softer moments, and its rhythm. This will guide your choreography.
- Marry Movement with Music: Time your steps, turns, and jumps to coincide with the music’s highlights. A soaring leap can coincide with a music crescendo, while more delicate dance steps can match softer musical moments.
- Practice with and without Music: While music adds a layer of complexity and artistry, practicing without it ensures you don’t become overly reliant. It helps in focusing on the technical precision of each move.
Incorporating dance and choreography into balance beam routines elevates the art of gymnastics. It adds a layer of sophistication and depth, transforming a series of athletic moves into a captivating performance. As you meld athleticism with artistry, you showcase a holistic understanding of the discipline, where strength meets grace and where skill meets expression.
FAQs
- What are the benefits of practicing on a balance beam at home?
Practicing on a balance beam helps improve balance, coordination, and core strength. It also aids in enhancing mental focus, building confidence, and developing discipline.
- Is a professional-grade balance beam necessary for home practice?
Not necessarily. There are home-appropriate balance beams designed specifically for personal use. They’re often shorter and easier to store. Ensure it’s sturdy and meets your requirements.
- How much space is required to set up a balance beam at home?
Ideally, you should have enough room on each side of the beam for safe dismounts and movements. A space of at least 10-12 feet in length and 6 feet in width should suffice.
- Are there age restrictions for practicing on a balance beam?
While there’s no strict age limit, it’s recommended that young children practice under supervision. Seniors or those with mobility issues should consult with a healthcare professional before starting.
- How can I ensure safety while practicing at home?
Using a mat underneath, ensuring the beam is stable, wearing appropriate attire, and staying within one’s skill level are all crucial safety measures. If trying new moves, having someone supervise or spot can be beneficial.
- How often should I practice for optimal results?
Consistency is key. Ideally, practicing 3-4 times a week should yield noticeable progress. However, the frequency might vary based on individual goals.
- What kind of maintenance does a home balance beam require?
Regularly check for wear and tear, clean with mild soap and water, and store in a cool, dry place. Ensure it remains stable and free from obstructions.
- Is it possible to self-teach or are professional lessons recommended?
While many basics can be self-taught, especially with online resources, professional guidance can be invaluable, especially when advancing to more complex maneuvers.
- Can balance beam exercises replace my regular fitness routine?
While balance beam exercises offer unique benefits, they should complement, not replace, a holistic fitness routine that includes cardiovascular, strength, and flexibility training.
- How do I progress to more advanced moves safely?
Always ensure you’ve mastered the basics before progressing. Consider seeking advice or tutorials from professionals, and always practice new moves with caution.
Conclusion
Mastering the balance beam, an intricate blend of grace and athleticism, is no small feat. Yet, as we’ve explored, the confines of a professional gym aren’t the only place where one can nurture their passion and skill. By harnessing dedication, prioritizing safety, and leveraging resources effectively, it is entirely possible to make significant strides in balance beam proficiency right at home.
Mastering the balance beam is not just about the physical accomplishments but also about the inner growth, resilience, and determination you develop along the way. Whether you’re practicing on a professional beam, a DIY setup, or simply using a taped line on the floor, remember that every effort is a step closer to mastery. Embrace the journey, celebrate the milestones, and let the beam, no matter its form, become a testament to your dedication and love for the art.